How to Install a Ceiling Fan Light Kit, Step by Step
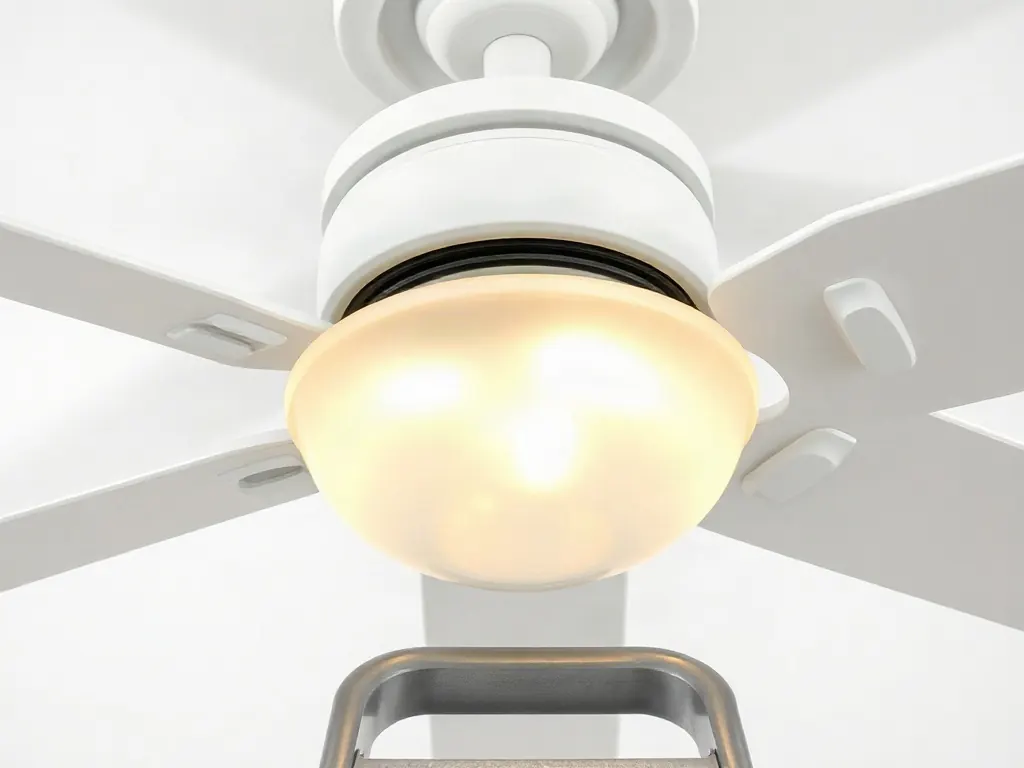
Check that your fan can take a kit, cut the power at the breaker, open the switch housing, connect the light lead, mount the kit and fit bulbs within the limit.
By Cool Ceiling Ideas editorial teamUpdated 7 min read
In this article
- Can your fan take a light kit?
- What comes in the box and the tools you need
- Step 1: Turn off the power and test
- Step 2: Remove the switch housing cap
- Step 3: Connect the light kit wires
- Step 4: Mount the fitter and the kit
- Step 5: Fit bulbs within the wattage limit
- Step 6: Restore power and test
- How do you dim or control the new light?
- What if the new light doesn’t come on?
- When to call a licensed electrician
The short answer: to install a ceiling fan light kit, confirm the fan is built to take one, then turn off the breaker and test for power. Remove the switch housing cap, connect the kit’s plug or wires and screw the kit in place. Fit bulbs within the wattage limit and test. Your kit’s manual comes first at every step.
The kit connects inside the switch housing at the bottom of the fan. Here’s each step in order.
Important: You’ll be working with line-voltage wires inside the fan. Turn off power at the circuit breaker, not just the wall switch or the pull chain, and confirm it’s off with a voltage tester. Follow the fan’s and the kit’s manuals and your local code, and hire a licensed electrician if you’re unsure about any step.
Can your fan take a light kit?
Only if it was designed for one. Check three things before you buy anything.
- The switch housing cap. A light kit mounts to the switch housing, the cup under the motor where the pull chains come out. A “light kit adaptable” fan usually has a center hole or a removable plug in that cap. Westinghouse, for example, says its 7785600 cluster kit fits most standard 42 to 52 in. fans “with a center hole in the housing cap”.
- A light wire. The kit needs a power lead inside the fan, usually blue. Some fans have no blue light lead and can’t take a kit at all.
- Brand and model. Hunter says light kits aren’t universally compatible across fan makes and models, and it doesn’t sell a universal kit. Not every Hunter kit fits every Hunter fan, either. Each Hunter kit page lists the fans it fits.
We’d start with the kit your fan’s manual names, then look at universal-style kits only if the brand offers none. To compare options, see our roundup of light kits with verified specs and fit notes. If your fan has no light provision, a fan with the light built in is usually the simpler route; our best ceiling fans with lights list starts there.
What comes in the box and the tools you need
Depending on the kit, the box holds a fitter (the part that attaches to the fan), a shade or glass, and the bulbs. Kits made on or after January 21, 2020 must also ship with a bulb for every socket under federal efficiency rules. The Westinghouse 7785600 uses a 4.25 in. fitter and comes with three 6.5 W A19 LED bulbs, and Hunter’s 99070 kit includes glass shades and its LED bulbs.
For tools, fan manuals list roughly the same set:
- A stepladder
- Screwdrivers (Harbor Breeze names a Phillips)
- Pliers and wire strippers
- A voltage tester
- Electrical tape and safety glasses (Harbor Breeze)
Our view: keep both manuals open side by side. The fan’s shows how its switch housing opens; the kit’s shows the wiring.
Step 1: Turn off the power and test
Switch off the circuit breaker that feeds the fan and its wall switch. Hunter’s manual says to tag the panel if the breaker can’t be locked off, so nobody switches it back on while you work.
Then confirm the power is off with a voltage tester at the fan’s wires before you touch them. A pull chain or wall switch in the off position isn’t enough.
Step 2: Remove the switch housing cap
Take off any existing bulbs and glass first, then open the switch housing the way your fan’s manual shows. Hunter’s globe-kit manual covers several housing styles, each with its own assembly:
- A cap held on by screws
- A cap with a removable plug button in its center
- A housing you remove to reach the cap screws
Keep the screws: the kit may reuse them.
Step 3: Connect the light kit wires
Inside the switch housing you’ll find one of two setups.
- A plug-type connector. Many fans use a plug-together connector (often called a molex) or color-matched quick connectors. Push the kit’s plug into the fan’s until it seats firmly.
- Loose leads. Hunter’s kit manual joins the fan’s blue or black light wire to the kit’s black wire, and white to white.
Use the connectors your manual calls for. Harbor Breeze says no bare wire or strands should be visible once the connections are made.
Inside the fan, that’s all the wiring a kit needs. Whether the light then gets power depends on the wiring at the ceiling box. With one wall switch, the fan’s blue lead normally shares the house black wire with the motor. With two switches, it goes to the second switched hot, usually red. Our ceiling fan wiring guide explains both layouts, so you can check which one your ceiling box uses.
Important: If the wire colors in your fan don’t match the kit’s diagram, or you can’t find a light lead, stop. Hunter’s kit manual says wiring must follow national and local codes (ANSI/NFPA 70) or be done by a qualified electrician.
Step 4: Mount the fitter and the kit
Tuck the wires into the switch housing, line up the fitter’s holes with the switch housing, and drive in the screws. Hunter and Harbor Breeze both warn that loose housing screws can let the fixture fall, so tighten each one fully.
Then attach the glass or shades as the kit’s manual shows. Hunter also lists a loose light kit among the common causes of ceiling fan wobble, which is one more reason to check every screw before you move on.
Step 5: Fit bulbs within the wattage limit
Every light kit has a maximum wattage. Hunter says to find it in the owner’s manual or on the label at the socket. It warns that going over the MAX wattage sticker may cause a fire hazard. Harbor Breeze’s light kit allows 190 W in total.
That 190 W figure has a history. A federal rule (10 CFR 430.32(s)(5)) covered light kits made from January 1, 2009 to January 21, 2020. It applied to kits with sockets other than medium screw base or fluorescent pin sockets, such as candelabra. Those kits had to ship with bulbs and could not run bulbs totaling more than 190 W. Many older kits carry a wattage limiter for that reason.
Use the bulbs that came with the kit, or the same type and wattage when you replace them. Hunter says its bulb-based kits have taken medium (E26) bulbs since around 2018, while older models may use other bases.
Step 6: Restore power and test
Turn the breaker back on and test the light from every control it has: the pull chain, the wall switch and the remote if there is one. Then run the fan through each speed. If you need to flip the reverse switch, Harbor Breeze says to wait for the fan to stop first.
How do you dim or control the new light?
The light needs its own control, never a dimmer on the fan motor. Dimming works only when both the bulbs and the control are rated for it.
- Pull chain. On a one-switch setup, the kit’s chain turns the light on and off.
- A separate wall switch. With two switched wires at the ceiling, the light gets its own switch.
- A remote. Hunter says its remotes have dimming on by default. With non-dimmable bulbs, Hunter says to turn the dimming feature off to prevent flicker. Adding a canopy receiver also changes things. Hunter notes the second wall switch no longer functions. Our guide to ceiling fan remote kits compares receivers.
Important: Never control the fan motor with a light dimmer. Harbor Breeze warns that a full-range dimmer on the fan causes loud humming and is a fire and shock risk. Hunter’s wiring guide says an existing wall dimmer must be replaced with a plain on/off switch because a dimmer can’t operate a ceiling fan.
We’d only dim through the remote or wall control your fan’s manual lists.
What if the new light doesn’t come on?
Start with the simple checks: bulbs screwed in and within the wattage on the socket, the light chain pulled on and both wall switches on. If the bulbs went over the limit, the wattage limiter may have cut the light, and it needs the correct bulbs and a power reset.
Next, with the breaker off again, recheck the plug in the switch housing. Hunter’s manual lists the plug connection there among its troubleshooting checks.
When to call a licensed electrician
In our view, stop and call a licensed electrician if any of these apply:
- The wire colors in the fan or ceiling box don’t match your manuals.
- Your fan has no light lead, or you’d need a new wire or switch run to control the light separately.
- The wall switch has no power with the breaker on.
- The breaker trips, or you see scorch marks, hear crackling or smell burning. Leave the breaker off until an electrician checks the fan.
- You’re not comfortable working with wiring. Hunter and Harbor Breeze both say to use a qualified electrician if you’re unfamiliar with it.
If anything doesn’t match the manual, that’s the moment to hand the job over.
Frequently asked questions
Can I add a light kit to a ceiling fan that doesn't have one?
Only if the fan was built to take one. Look for a switch housing cap with a center hole or removable plug, a light wire (usually blue) inside the fan, and a kit from the fan's brand that lists your model. Some fans have no light lead and can't take a kit.
What wires do I connect when installing a ceiling fan light kit?
Many fans use a plug-type connector in the switch housing, so you just push the kit's plug into the fan's. With loose leads, Hunter's kit manual joins the fan's blue or black light wire to the kit's black wire, and white to white. Follow your kit's diagram.
Do I need to turn off the breaker to install a fan light kit?
Yes. Turn off the circuit breaker for the fan and its wall switch, not just the switch or the pull chain, and confirm the power is off with a voltage tester before you touch any wire.
How many watts can a ceiling fan light kit take?
Use the maximum printed on the socket label or in the manual. Hunter warns that going over it may cause a fire hazard. Many kits made from 2009 to January 2020 also have a limiter that cuts the light above 190 W in total.
Can I put my new fan light on a dimmer?
Only with dimmable bulbs and a control that can dim, and only on the light's own wire. Never run the fan motor through a light dimmer: Harbor Breeze warns it causes loud humming and is a fire and shock risk.
Related guides
How-To
Ceiling Fan Wiring: What Each Wire Does, With One or Two Switches
What the black, white, blue, red and green wires do, how one-switch and two-switch setups differ, and when to stop and call an electrician.
8 min read
Buying Guides
Best Ceiling Fan Light Kits (2026) and How to Add One
Will a light kit fit your fan, which bulbs and brightness to choose, what the federal rules changed, and four kits with verified specs.
10 min read
How-To
Best Ceiling Fan Remote Kits (2026): Universal and Brand Remotes
Universal and brand remote kits compared: what fits your fan, why DC fans need their own remote, reverse and dimming limits, and pairing.
10 min read
How-To
Ceiling Fan Wobble: Why It Happens and How to Fix It
Most wobbly fans need tightened screws and a balancing kit, not a new fan. Here's the fix in order, and the signs that wobble is a safety problem.
8 min read